Now the time has come to do the configuration of the project. In the configuration process, all variables defined in the VAR_INPUT or VAR_OUTPUT sections of your program will be assigned to in- or outputs, numerical values, strings, and voice messages. During program development, you do not need to think about which specific in- or outputs to use, because you delay that decision until the configuration process.
Now let us configure the Greenhouse project:
First, double-click on the Job "Job_Greenhouse_1" in the project tree on the left part of the screen. This should bring up the configuration dialogue:
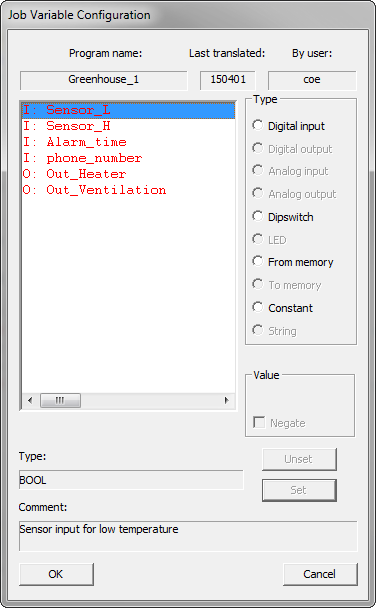
This is the configuration dialogue. The list to the left shows you all the variables defined in the VAR_INPUT and VAR_OUTPUT sections. The variables with an "I:" in front of them are inputs, and the variables with an "O:" in front of them are outputs. When you select one of the variables, the two fields at the bottom of the dialogue show you the type and comment field of the variable (the text written with orange in the editor when you enter the program). To the right, you see a list of the different types you can assign the variables to. Some are grayed out, which means they are not active for this particular type of variable.
So, let us assign something to our variables.
First, make sure the uppermost line is selected - Sensor_L.
Next, click on "Digital input". Now the configuration dialogue looks like this:
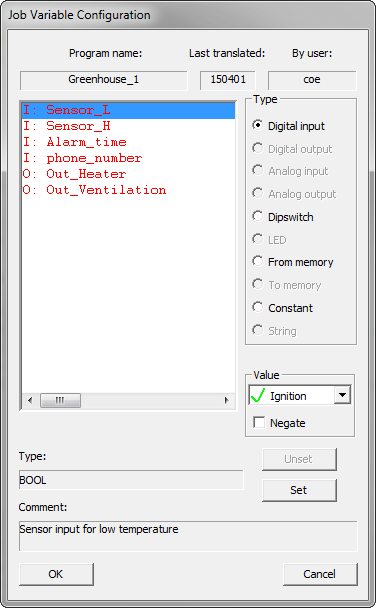
The next free item in the "Item" group is, in this case: "Ignition". It will be selected automatically. Select "Input 1" instead and after that, you want to click the "Set" button. The assignment is not done before you click the "Set" button. After you click the "Set" button, the next non-configured item in the list will automatically be selected. After you click the "Set" button, the configuration dialogue looks like this:
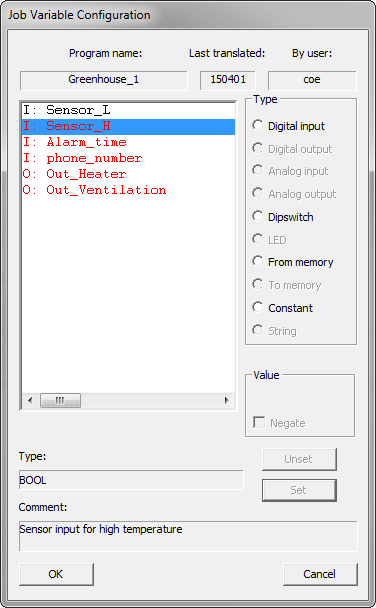
Then click on the "Digital input" and select the "Input 2" item. Press the "Set" button.
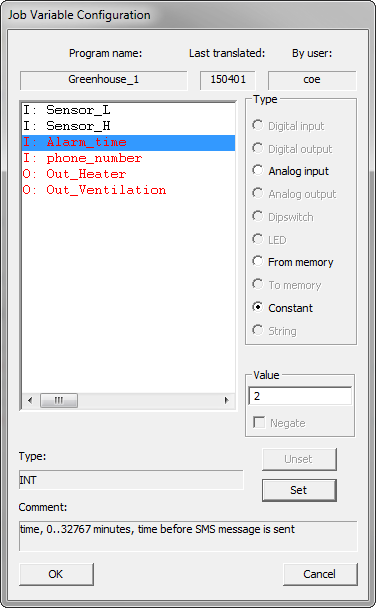
The "Alarm_time" is next. This variable must be assigned a value. Press the "Constant" type, and then write the number "2" in the entry field in the "Item" group box. The dialogue now looks like this:
Press the "Set" button. Now the "phone_number" variable will be selected from the list. This is a STRING data type that holds the phone number of your GSM mobile phone. This is the number of the phone the program will send SMS text messages to, when the greenhouse is unable keep the temperature within limits. Click on "String". Type the number in the entry field in the "Item" group box. The dialogue now looks like this:
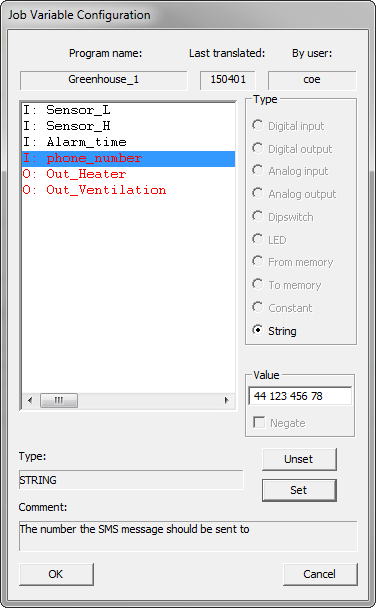
Press the "Set" button.
Now you probably have a firm grip on the configuration process, so we will quickly move over the last two items that need to be configured.
The "Out_Heater" variable is selected. Select "Digital output" and accept the "Output 1" item shown. Press the "Set" button.
Finally, the "Out_Ventilation" variable is selected. Select "Digital output" and accept the "Output 2" item shown. Press the "Set" button.
All the configurable variables of the program are now configured. You may have noticed that when a variable is configured, it will change its color from red to black. When you press the "OK" button, the configuration data is saved for the project.
Press the "OK" button.
Now you have a complete project that is ready to be transferred to an RTCU device, or tested in the RTCU Emulator.
And testing in the emulator is just what is next.
Chapter 7 Run the project in the RTCU Emulator
 This is a good place if you want to take a break from the tutorial and come back later.